DIY Window Replacement in Charlotte
When it comes time to replace old windows in your home, you have a couple of different options. You or a contractor can install an entirely new window unit — including new insulation, frame and trim — or you can keep your existing window frame and install a replacement window (also called an insert window or a pocket window). While window replacements are more economical to install than completely new windows, you probably won’t get the same energy savings and you may lose some of your viewing area since the replacement window is installed within the existing frame.
If you’re undertaking a large renovation project, new windows may be the best option. In the case that your window frame is still in good shape, replacement windows are the best value.
1. Choose the right type of window
If you’re planning to completely reinstall new windows, you have a lot of options for the type of window you want. If you simply need to replace the window sash, you can order a correctly sized replacement window to fit inside your existing frame.
2. Measure twice, cut once
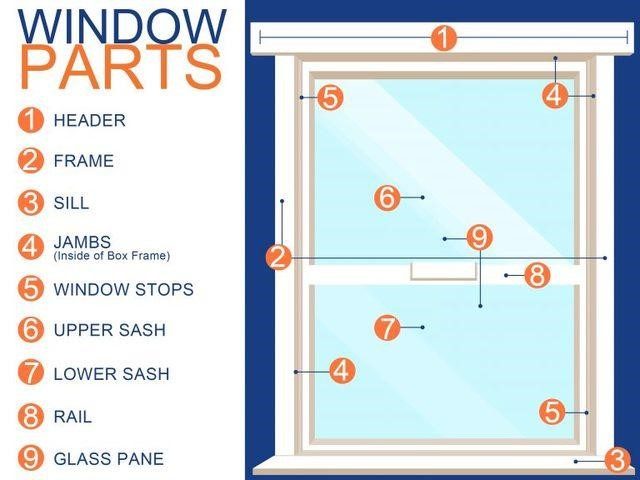
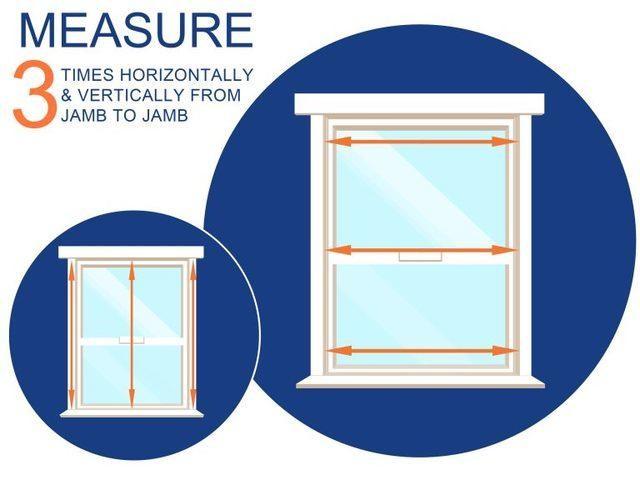
When installing a replacement window, follow the old adage and measure multiple times in multiple places before you remove the window. From inside your home, measure the width and the height of the window from jamb to jamb. Take at least three measurements across the window — from left to right and top to bottom. Use the smallest measurement to be sure your replacement window will fit your frame. You can fill gaps later.
3. Remove the original window
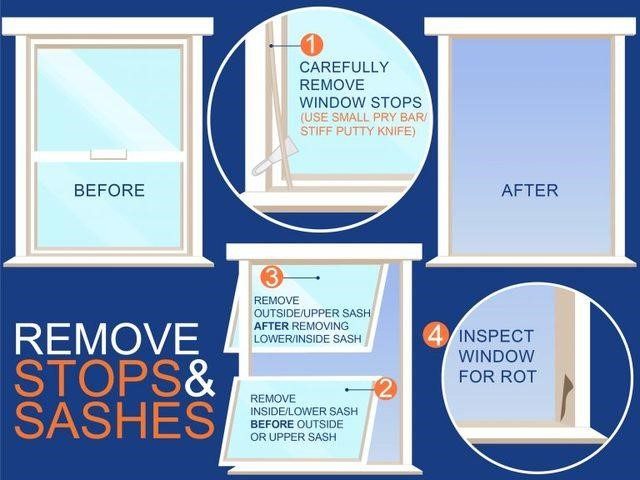
Without damaging them, remove the outside stop pieces on the left and right sides of the window. Remove the window sash carefully, especially if you’re dealing with cracked or broken glass. Take out the inside sash first, and then slide the outside sash down and remove it the same way. If the inside sash is connected to a weight by a chain or cord, cut it and let the weight fall into its well. This is a good time to clean up the window jamb and fill any holes or cracks with caulk. You can also remove weights you had to cut, remove excess putty or caulking, and get rid of protruding nails. If you notice frame damage or rot, call a professional to discuss new windows. This is often a much easier proposition than repairing a rotting frame.
4. Fit the replacement window to the frame
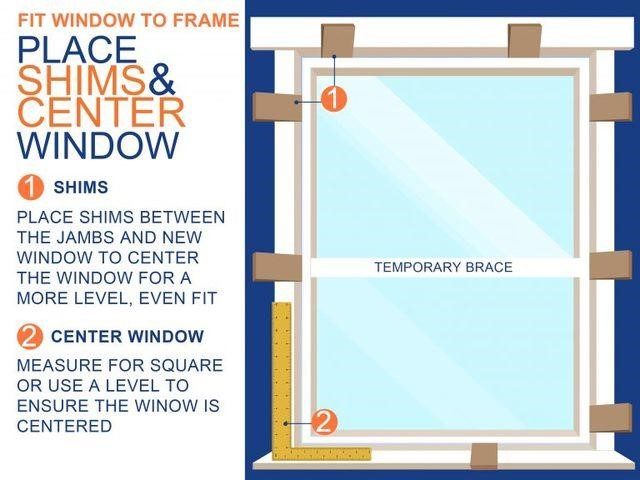
Center the new window, using shims below the horizontal jambs where necessary. Replacement windows almost never fit perfectly, but shimming should only raise one side by a quarter-inch or so. Mark your shim placement on the wall. Make sure the window is plumb and level.
5. Install the new window
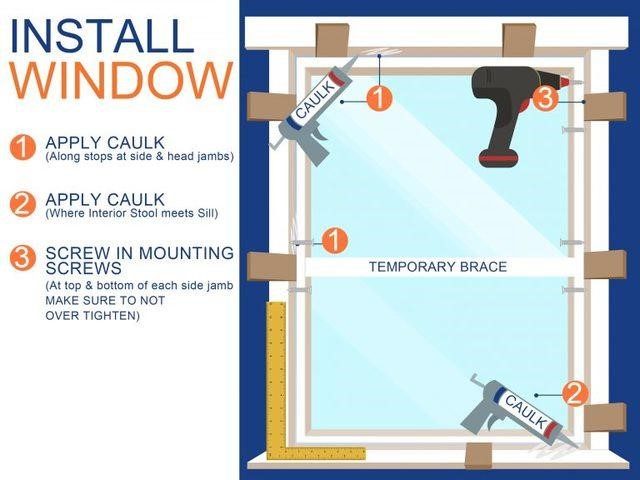
Lay a bead of caulk along the inside of the interior stops on the jambs. Place your window and make sure it’s square. Tap in the shims, leaving an inch or so sticking out in case you need to adjust them. Screw in the mounting screws at the top and bottom of each side jamb, making sure not to over-tighten them. Move the header up so that it seals any gap between the top of the new window and the old frame.
6. Check for smooth operation
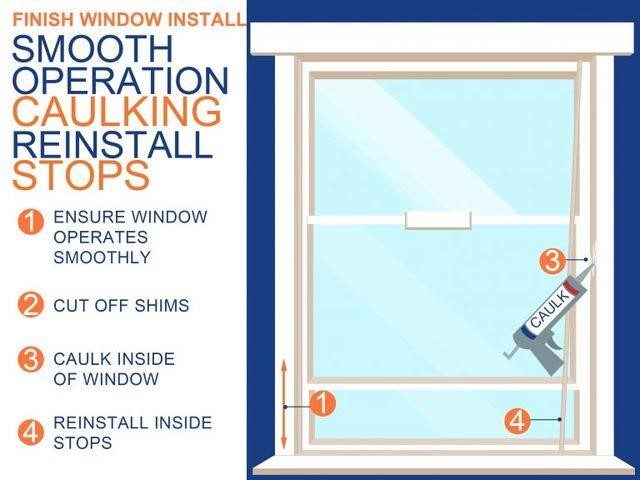
Move the top and bottom sashes up and down. If the sashes don’t operate smoothly, use adjustment screws in the side jambs to adjust the window frame. You might need to adjust the shims at this point. Once the window is sliding easily, cut off the protruding pieces of the shims, caulk the inside of the window, and reinstall the inside stops.
If a window replacement project isn’t something you want to undertake yourself, call the professionals at TruGuard. We install new and replacement windows, and we guarantee our work.

